If you’re building your own home, renovating an area of your home, or even just swapping out the carpet in one or more rooms, you’re going to encounter subfloors and the fasteners that hold them to your floor joists. In some cases, you may not have a subfloor—just a concrete slab underneath—but in most cases, homes have some type of subfloor in place.
For homeowners, builders, or renovators who are installing, replacing, or re-securing a subfloor, the primary choice they face is related to the subfloor screws. Are they better than nails? What’s the right size for the screws? How should they be installed? Check out this guide for information about subfloor screws, subfloor nails, fixing squeaky floors, and recognizing subfloor damage.
Types of Subfloor Screws
There are two main categories of screws that are designed for subfloors.
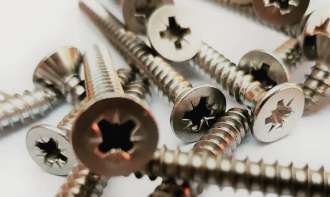 Steel screws: These screws typically have a helical thread that spirals partway up the screw. They are designed to keep the plywood intact without causing too much fiber damage, and they can sustain a great deal of lateral movement without warping or snapping. This durability is referred to as “shear strength.” Steel screws are often used for interior subfloors.
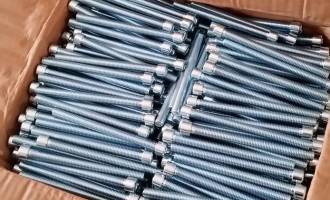 Galvanized screws: This type of screw gets its name from the manufacturing process used to create it. These are steel screws that have been given a special coating to protect them against rust and deterioration. Due to their extra level of moisture resistance and durability, galvanized screws work well when you’re installing chemical-treated lumber or working on exterior floors such as porch floors or deck floors.
If you’d like to try another kind of screw that isn’t specifically designed as compatible with subfloor projects, you could try using deck screws. Whatever you do, don’t use drywall screws for the subfloor. While these screws work well for the needs of drywall panels, they are simply not strong enough for the rigors of subfloor use.
Under the stress of regular wear and tear, drywall screw heads usually snap off if they are employed in the subfloor. It’s better to use screws whose features are specifically engineered to work for securing subfloor plywood in place.
Subfloor Screw Sizes
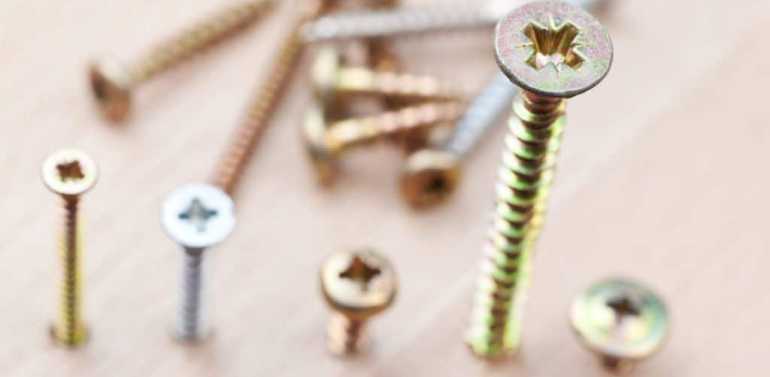
When you’re installing an interior subfloor using 3/4-inch plywood, you’re going to want screws that are labeled #8, #10, or #12. These numbers indicate the diameter or thickness of the screws.
In addition, you’ll find that steel screws come in a number of different lengths. The shortest ones are 1 1/14 inches, while the longest are 3 inches. Most construction experts use 3-inch steel screws for plywood subfloors.
To find out which length of screw you’ll need, you first have to know how thick the flooring is. You’ll want the screw to go about an inch past the plywood into the joist or underlying layer beneath it. So if your subfloor is 3/4 of an inch thick, any screw about 1 3/4 inches long will do the trick. If the plywood subfloor you’re placing is 5/8 of an inch thick, you need a screw about 1 5/8 inches long.
Using Subfloor Screws to Correct Squeaky Floors
When subfloors are nailed in place, the floor can become extra squeaky, either almost immediately or over time. If your home is suffering from squeaky floor syndrome, you can remedy this issue by replacing the subfloor nails with screws instead.
You’ll need to do this room by room. Take all items, including furniture, out of the room, and begin prying up the carpet. This is easier if you start in the corner of the room and use pliers to get the carpet free of the tack strip.
Once you loosen the corner, it should be fairly easy to pull the rest of the carpet up. If you’re going to reuse the carpet after you include the subfloor screws, roll up the carpet and set it carefully aside. If you’re getting rid of the carpet in favor of new carpet or other flooring, you can handle it better if you cut it into strips first and make smaller carpet rolls, which are easier to carry out for recycling or disposal. Be sure to wrap duct tape around each carpet bundle to keep it tightly rolled. After that, remove the staples securing the carpet pad and pull that up as well.
Now you should be able to see the nails on the floor. The areas where they are lined up or clustered mark the floor joists. Floors with nailheads 16-19 inches apart are likely about 3/4 inch thick, which suggests the need for screws at least 1 3/4 inches, and possibly up to 2 inches long. A wider gap between clusters of nails may indicate a floor 1.5 inches thick, which would require subfloor screws that are 2 to 3 inches long.
Using the guidelines mentioned earlier, put in the subfloor screws. The screws will create a tighter, stronger bond that the old nails did. With all the parts of the floor pulled together and secured, you’ll probably find that most of the creaks disappear.
Which to Choose: Subfloor Screws or Nails?

If you’re in a hurry, using nails to affix the subfloor might be very tempting. After all, it’s a relatively quick process, especially if you have an efficient air nail available. An air nailer permits fast, easy fastening, allowing you to insert multiple nails per minute.
Nails are also cheaper, so they appeal to builders or DIY home renovators who are on a tight budget. However, you want to be sure that if you do use nails, you’re using the high-quality ones, like stainless steel. Ring shank nails are a popular choice, since they have a bit of a threaded design to them and enable a slightly tighter grip. However, they still can’t replace the power of a good subfloor screw.
Inserting screws is a tough job, even with the right tools, and it can take some time to do it right. However, as we’ve seen, do a good job of screwing on that subfloor can result in much quieter floors. Screws have that threaded structure which enables a tighter bond and a stronger grip; so if excellent quality and long-lasting security is important to you, consider opting for subfloor screws instead of nails.
More Tips for Installing a Subfloor
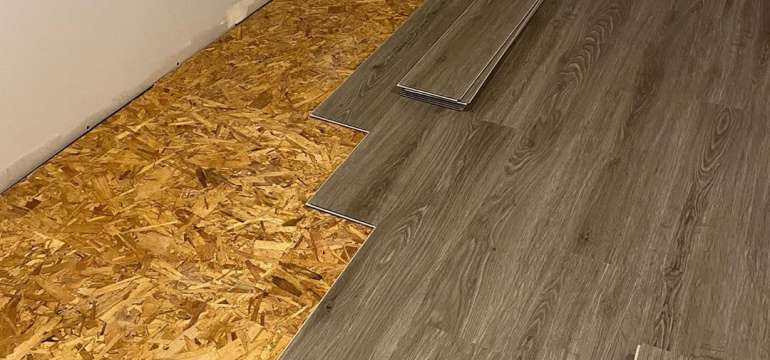
In addition to using the proper screws, it’s important to arrange the subfloor sections the right way. You want to stagger the seams of the plywood underlayment, offsetting them so that they are not all lined up together. Offsetting the seams actually creates better support and balance for the subfloor as a whole.
If you want to avoid problems with your subfloor buckling, you should be sure to space the sections with a 1/8-inch gap at each end or edge. This permits the floor to flex and expand a little as necessary.
Avoid using green joists for your floors, but instead use sturdy, performance-tested lumber. Some experts recommend choosing kiln-dried lumber for floor joists. In addition, be sure to allow the subfloor dry completely before installing any additional top flooring.
While some people advocate simply nailing or screwing a subfloor in place, others swear by the use of a subfloor adhesive. Before you apply the adhesive, be sure that all your joists are clean, free of grime or residue, and that they are fully dry. Follow the instructions on the label of the subfloor adhesive that you’ve chosen to use. Typically, you’ll apply a bead or line of the glue about a quarter-inch wide to your supports, in a zig-zag pattern. In some cases, you may need a double line of glue.
Best Fasteners for Subfloor
According to construction and renovation experts, some of the best screws for subfloor include the Senco 08200Y screws, the Simpson Strong-Tie screws, and the Hillman Group 48248 subfloor screws. The first two of these come with a nice yellow zinc finish, while the Hillman Group screws are unassuming yet tough in basic black. These subfloor fasteners all perform well in plywood of 3/4 inches to 1 inch, and they even work for roofing sheets or wall plates.
You’re going to need a heavy-duty drill for this job, one that can handle tough projects and grind through hardwood. Sometimes it’s a good idea to pre-drill the holes first since you’re dealing with joists, which are hard to drill into. If you choose the Senco screws, you can also get the Senco Duraspin Screw Gun, which installs up to a thousand screws very quickly. So if you’re working on a big project, pairing these screws with an efficient screw gun may be the best way to accomplish the job in record time.
You can check Amazon or various reviews and ratings websites to discover other premium subfloor screws since companies produce different versions every year. Check the specifications for each type of screw, and then explore the reviews to find other customers who have used those screws successfully on their subfloors. You’re looking for screws that are easy to install, possess excellent staying power, and offer security while still allowing for easy removal if you need to adjust or redo a part of the subfloor.
Take your time selecting the best subfloors screws, and if you’re in doubt about the best pattern for installing them, check out some instructive guides and YouTube videos to inform you before you start the project. With the right kind of subfloor screws, you can have a sturdy floor that’s nearly squeak-free and offers you and your family a solid surface on which to live your everyday lives.

- How to Cut Lexan - September 25, 2020
- Mineral Spirits vs. Mineral Oil - September 25, 2020
- Shellac vs. Polyurethane - September 24, 2020