Although evaporative coolers require a fair amount of maintenance, homeowners can often easily perform it inexpensively by doing it themselves. Evaporative coolers vary, so the specific instructions that are available in the owner’s manual are very important.
In general, coolers should be inspected monthly and serviced as required. Ground and some eave mounted coolers are sometimes preferred because of their ease of maintenance as compared with roof mounted units.
During a monthly inspection, first unplug the unit and look for any damage or wear. Belt tension and water level in the reservoir should be checked. To insure maximum cooling, make sure that all pads are thoroughly and evenly wetted.
Pad maintenance is probably the most important part of keeping your cooling system working properly, and is discussed more thoroughly below.
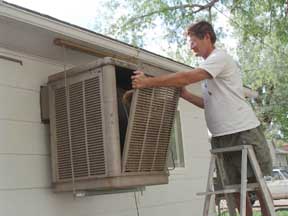
Figure 1: Remove the side panel for maintenance on a side-draft cooler.
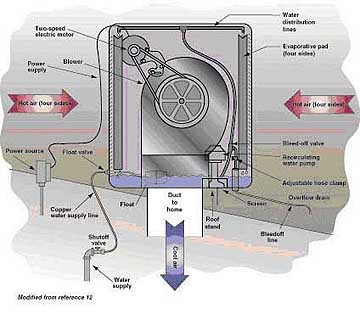
Figure 2: A typical down-draft evaporative cooler
(Reprinted from Journal AWWA, Vol. 90, No. 4 (April 1998), by permission. Copyright © 1998, American Water Works Association.)
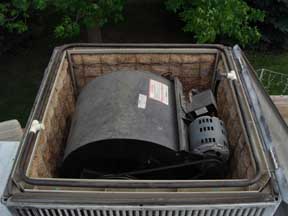
Figure 3: Inside a typical down-draft cooler.
Pad Replacement
Evaporative cooler pads need to be routinely checked and replaced as necessary. There are two main types of pads: fiber and rigid-sheet, which are discussed below. Consult your manual or cooler supplier if you aren’t sure which pad is right for your cooler.
Fiber pads are typically the least expensive pad and require the most maintenance. The pads need to be replaced every year or two, depending on the pad. To lengthen the life of a pad, you can rotate and turn the pad upside down so that the previously downstream side becomes the upstream side.
Fiber pads made with Aspen wood are recommended because they typically last the entire cooling season and are efficient air coolers. However, they can produce debris in the water reservoir, which will require further maintenance.
Cellulose fiber media are also recommended for their cooling ability and durability over several seasons. Spun aluminum and plastic pads are the least expensive, but often require frequent replacement within a single season.
Rigid-sheet pad coolers are a thicker, more expensive option, but they don’t need to be replaced as often. These pads move air through a stack of corrugated sheet material.
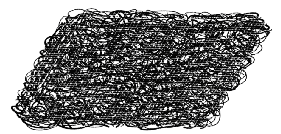
Figure 4: Aspen wood fiber pad.
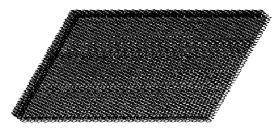
Figure 5: Paper cellulose pad.
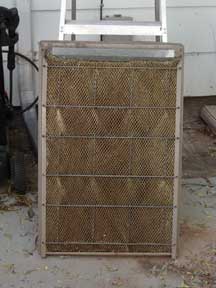
Figure 6: Natural fiber pad.
The primary reason that pads need replacing is because many evaporative coolers operate with hard water (i.e. water with a high concentration of dissolved minerals). As the hard water evaporates, it leaves mineral deposits, or “scale” on the pads and cooler.
This causes pads to be less efficient and can corrode and rust metal coolers. This can shorten a cooler’s life span by 50 percent and requires pads to be replaced frequently.
To counter this problem, many systems include bleed valves that drain some of the re-circulating water. In addition, “sump dump” systems drain water periodically from the reservoir.
Sump dump systems are very useful because they also flush out much of the dirt and debris that collects in the reservoir. Both practices help to reduce the amount of scaling that occurs on the coolers.
However, they also substantially increase the amount of water used by the coolers. The water that is flushed out from these systems can sometimes be used for irrigation purposes if the concentration of minerals is not too high.
In places where water conservation is important, another option to reduce scaling is to “soften” the incoming water with chemicals that will increase the solubility of calcium and other minerals. This will reduce the bleed rate and therefore water usage. However, you should consult your cooler supplier before going ahead with this option.
If you chose not to install a bleed valve or sump dump, you should do a thorough cleaning of the unit at least once during the cooling season in order to remove the build-up. Rigid pads should be washed down every fall when the scale/build-up is still soft. Aspen pad coolers should be maintained or replaced in the spring.
Other Maintenance Tips
Bacteria growth can be a problem in evaporative coolers. If you will not be using your evaporative cooler for even a few days, it’s a good idea to drain the cooler so bacteria don’t start growing. Alternatively, treat the standing water with chlorine 30 minutes before starting up the cooler.
In combined systems (systems where evaporative coolers and refrigeration units share ductwork), dampers should be checked annually.
Maintenance Timeline
Below is a timeline that was developed by Water Wise of the University of Arizona Cooperative Extension. This will help you keep on track with your seasonal cooler maintenance.
Spring Cleaning
- Uncover your cooler, remove the panels and clean out any debris in the water pan at the bottom.
- Check the motor’s fan belt tension. When pressed it should move about one half inch. Lightly oil the bearing on the blower assembly and the motor if it has an oil receptacle.
- Install new cooler pads. Aspen wood fiber pads are a good choice, or follow manufacturer’s recommendations.
- Reconnect the water line and turn on the water supply. Check the float valve and make sure it is operating properly. If necessary, adjust the float arm by bending it.
- Switch on the cooler motor and recirculating pump, making sure the cooler pads are being evenly saturated with water. Look for split seams in the casement, or rusted areas in the tray, which could cause a leak.
Mid-summer Checkup
- Check the water level in the bottom tray. It should be about one inch below the top of the tray, and below the top of the overflow pipe. If the water level is too high or too low, adjust the float arm.
- Make sure your float valve is working properly. If the valve sticks, the water will run continuously, causing water to overflow the tray and be wasted. Adjust your float arm and, if that doesn’t fix the problem, install a new float valve or call a cooler specialist.
- Check all other working parts, including the pump, motor and fan belt.
- Check the condition of the cooler pads. The cleaner the pads, the more efficient the cooler. If they have a heavy accumulation of mineral deposits, replace them.
- Some coolers have a “bleed-off valve” to drain the recirculating water to prevent excessive mineral buildup. Make sure the valve is adjusted properly to drain no more water than is necessary. Check your manufacturer’s recommendations for best results.
Winterize
When the weather begins to cool, it is time to winterize your evaporative cooler. If you do these few simple things, you will minimize your cooler problems in the spring when the hot weather hits.
- Get rid of minerals in the bottom tray. Vinegar can be used to dissolve the buildup.
- Clean out the tray at the bottom of the cooler. Drain the water and gently scrape it out.
- Inspect the water trough for clogged holes, clean as necessary.
- Thoroughly dry the tray and inspect it for signs of cracking.
- Coat the entire tray with submarine sealer or another product to prevent rust.
- To prevent freezing of the cooler’s water line, disconnect the water line from the cooler and blow out the water.
- Cover your cooler to protect it and to keep cold air out of your house.
- What to Do if Your House Smells Like Gas but There’s No Leak - February 6, 2023
- Why Is There a Burning Smell Coming From My Vents? - August 16, 2022
- How to Remove the Musty Smell From Your Air Conditioner - August 16, 2022

Lydia Loftin
Thursday 12th of April 2018
Awesome thank you!